Here are the steps to create the protected folder in Windows XP:
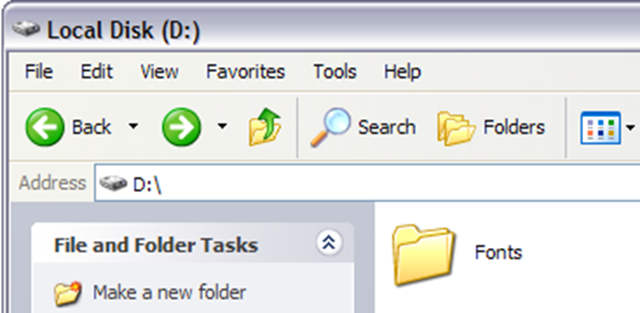
- First create a folder that you will use to store your confidential data. For example, I have created a folder called Fonts at the root of my D drive. Since the hidden folder will bring you to the Control Panel, it’s best to name the folder as one of the programs inside there.

- In the same location where you created the new folder, create a new file in Notepad, copy the following below into it, replace Fonts with the name of your folder and save it as loc.bat.
ren Fonts Fonts.{21EC2020-3AEA-1069-A2DD-08002B30309D}
- To save the file as a .bat file in Notepad, just put the whole thing in quotes, like “loc.bat” and then click Save.


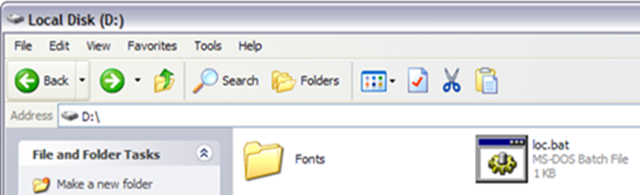
- Now you should have a bat file named loc in the same directory as your Fonts folder, not inside the Fonts folder.

- Create another NotePad file and type in the following listed below and save it as “key.bat”.
ren Fonts.{21EC2020-3AEA-1069-A2DD-08002B30309D} Fonts
- Now you’ll have loc.bat and key.bat along with your folder. Go ahead and double-click on loc.bat and your folder will turn into the Control Panel and nothing inside can be viewed. Clicking on it will simply bring you to the Control Panel. You’ll notice the icon should have changed also.

- To view the data inside your folder again, click on key.bat and your folder will return to normal! Pretty simple!
Of course, keeping the key.bat file in the same folder will defeat the purpose of securing the folder, so it’s best to move the key.bat file somewhere else, or even better, put it on a USB stick or CD that only you can access.
Most people will be probably look at the folder and simply ignore it since it has the control panel icon and it links directly there. Of course, if someone knows this trick also, they can create their own key.bat file, etc and open it back up. However, if you’re dealing with someone who can do all of that, it’s best you check out more advanced 3rd party software to lock down a folder.
It seems like people just can’t get enough of how to create hidden folders or locked folders, etc in Windows. I’ve already written two guides on how to hide a folder, one using a very simple built-in feature of Windows and another by using some Windows scripts. In the latter article, I also mentioned a free program that you can use called Folder Hide to completely remove a folder from visibility.
But there’s yet ANOTHER way you can hide a files and folders which is similar to the first post I mentioned above, but is definitely way more secure. It actually involves using the command prompt and a built-in Windows function to change certain attributes of a file or folder. Once the attributes have been changed, the files cannot be seen by the system.
The reason I like this method is because it does not involve any third part software (if someone sees FOLDER HIDE, they might ask you what exactly you’re trying to hide from them) and it’s not as simplistic as the first method I wrote about where you simply change the properties of the file or folder to hidden and anyone can easily un-hide the folder by configuring the Windows Explorer setting to “Show Hidden Files and Folders”.
Here’s how you can create a hidden folder in Windows for free that’s pretty secure:
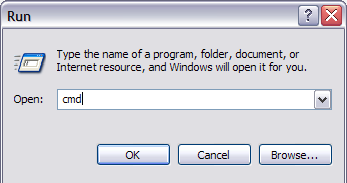
1. Go to Start, Run and then type in CMD to open the command prompt window

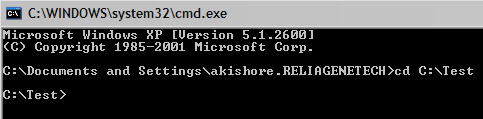
2. Now navigate to the parent folder of the folder you want to hide. If you want to hide a file, navigate to the folder where the file is located. For example, I want to hide a file in C:\Test, so I would type in the following:
CD C:\Test

3. Now type in the following command, replacing the word filename with the name of the file you want to hide.
attrib filename +s +h
And that’s it! Your file or folder is now completely hidden! It won’t show up in My Computer, it won’t show up if you browse via the command prompt and it won’t even show up if you select “Show all Hidden Files and Folders”.
If you want to un-hide the folder you simple follow the same steps, expect now you’ll run this command:
attrib filename -s -h
You can use this command for both files and for folders. In our example, if I wanted to hide C:\Test, I would go one level above to C:\ and then type in attrib Test +s +h.

You’ll definitely need to remember which folders or files you have hidden as there is no easy way of determining what’s missing, so make sure you remember what you hide!
So now you have three ways to make a folder or file in Windows XP invisible!
=
- How to create an "Invisible" hidden drive in Windows
You’ve probably read a bunch of posts on how to create hidden folders, secure folders, locked folders, etc, etc in Windows on many occasions! Hell, one of the most popular articles on this blog is How to create a secure and locked folder in Windows XP. However, hiding a folder is a tricky proposition and usually doesn’t work well unless you use something like Truecrypt.
But there’s yet ANOTHER way you can hide your “private” files using a nifty little registry hack that will completely remove an entire drive from your computer. The drive will not show up in My Computer, will not be accessible from the command prompt, and won’t even show up in Safe Mode!
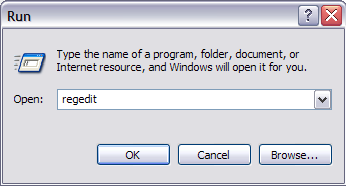
Ok, so here’s how to implement the hack: first off, back up your registry as this requires adding a key to the registry. Once you’ve backed up your registry, open the registry editor by clicking on Start, Run and typing in regedit.

Now navigate to the following registry hive shown below:
HKEY_LOCAL_MACHINE\Software\Microsoft\Windows\CurrentVersion\
Policies\Explorer
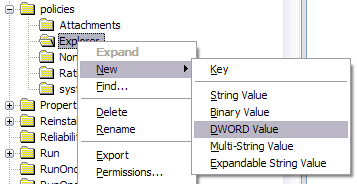
Right-click on Explorer and choose New and then DWORD Value.

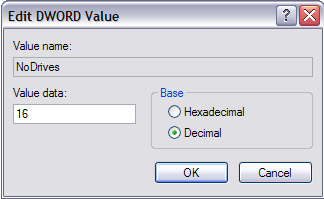
Name the new value NoDrives and then double click on it to open the properties dialog box. Click on Decimal for the Base unit.

Type in one of the following values depending on that drive letter you want to hide.
| A: 1B: 2C: 4D: 8 E: 16 | F: 32G: 64H: 128I: 256 J: 512 | K: 1024L: 2048M: 4096N: 8192 O: 16384 | P: 32768Q: 65536R: 131072S: 262144 T: 524288 | U: 1048576V: 2097152W: 4194304X: 8388608 Y: 16777216 | Z: 33554432All: 67108863 |
If you want to hide drive E, just type in the value 16. The really cool thing about this trick is the fact that you can hide multiple drives by adding the numbers of the particular drives together. For example, if you want to hide drive E and drive G, you would type in the number 80, which is 64 + 16.
Restart your computer and your drive will now be hidden! Trying to hide your system drive (C) will not work as Windows has to use this drive to run correctly, so don’t store your secret files there!
When you want to get your drives back, change the value of NoDrives to 0 or simply delete the value altogether. Of course, having to do this everyday can be a pain, so if you’re up for it, you can try and write a registry file that will allow you to insert and delete the value by just double-clicking a file.
This trick also works for mapped drives, so if you want to hide mapped drives, you can do it this way (though it might just be easier to disconnect a mapped drive).
Enjoy!
Source via MindConnection